Network tracing
If it has been enabled in your client, you can use the Network Trace tool to explore your network, for example to:
- Find customers downstream from a selected object.
- Display the shortest route from one object to another.
Routes can be displayed over geographic features and through internal views (where this data has been configured).
To use the Network Trace tool, click the Network Trace icon  . The Network Trace Tool dialog has two tabs, the Trace Out tab for identifying objects connected to a selected object, and the Find Route tab for identifying the shortest route between two objects.
Using the Trace Out tab
You can use the Trace Out tab in the Network Trace Tool to find objects connected to a selected object. For a network with a tree structure, you can choose to trace objects upstream or downstream of the starting object, or in both directions.
To trace out from an object:
- With the Trace Out tab of the Network Trace Tool dialog displayed:
- Select the object to trace out from on the map and click Set.
- Select the network for the trace.
- If the selected object is a member of multiple networks, select the relevant network.
- Additionally if the selected object has internal structures, select the relevant structure.
- If the network has a tree structure, select the direction.
- Select the maximum distance to trace (optional).
You can specify a unit of measurement, for example km or ft, or omit the units to accept the default for your installation. Contact your Administrator for information on units supported in your installation.
-
Click Trace. The trace is highlighted on the map and details of its elements are listed in the Details tab.
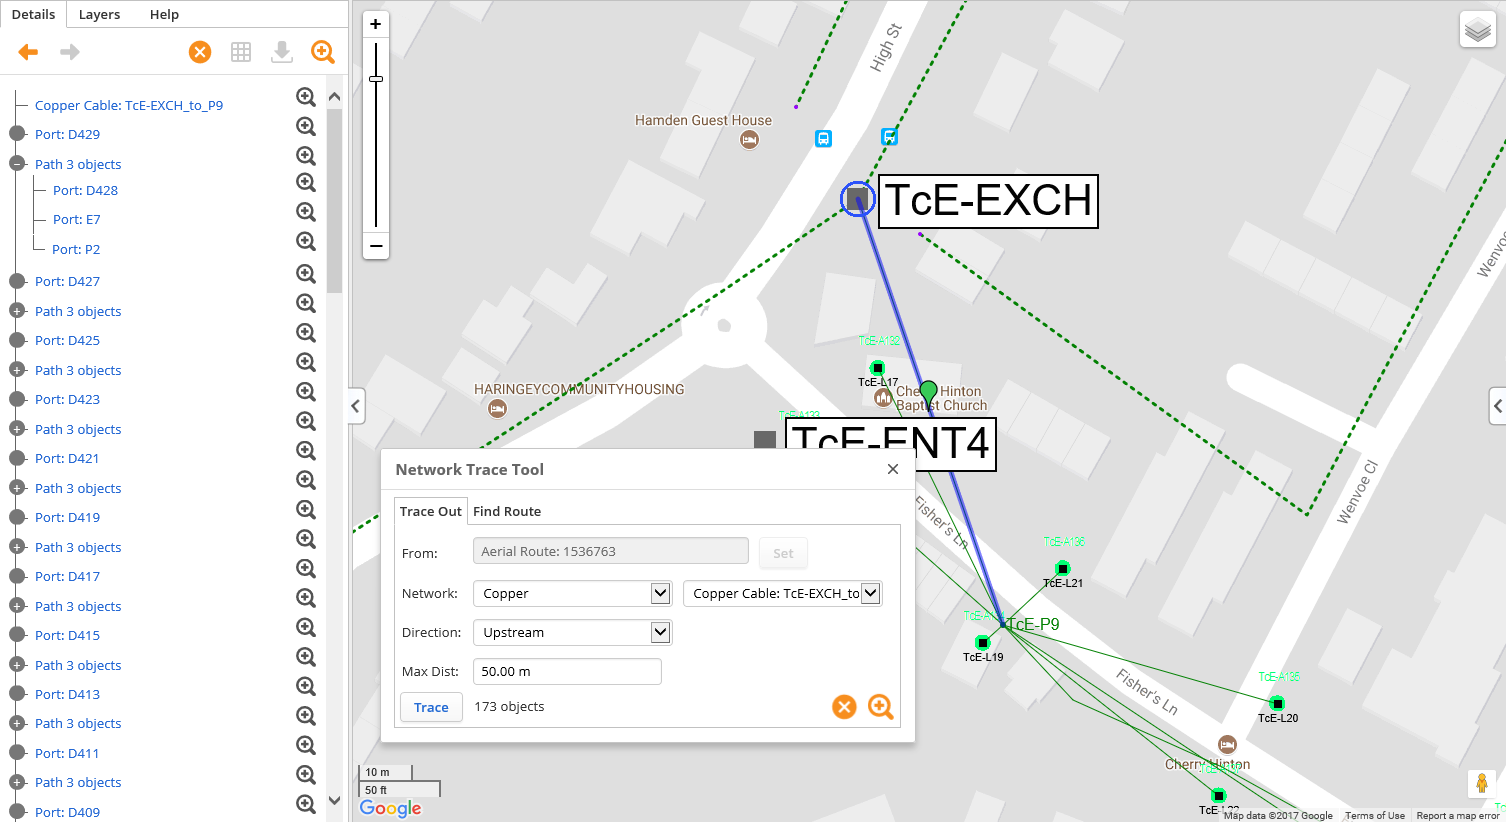
Figure: Trace out example
Using the Find Route tab
To find the shortest path between two objects:
- With the Find Route tab of the Network Trace Tool dialog displayed:
- Select the object to trace from on the map and click Set.
- Select the object to trace to on the map and click Set.
- Select the network to trace through.
- Select the maximum distance to trace (optional).
You can specify a unit of measurement, for example km or ft, or omit the units to accept the default for your installation. Contact your Administrator for information on units supported in your installation.
-
Click Trace. The trace is highlighted on the map and details of its elements are listed in the Details tab.
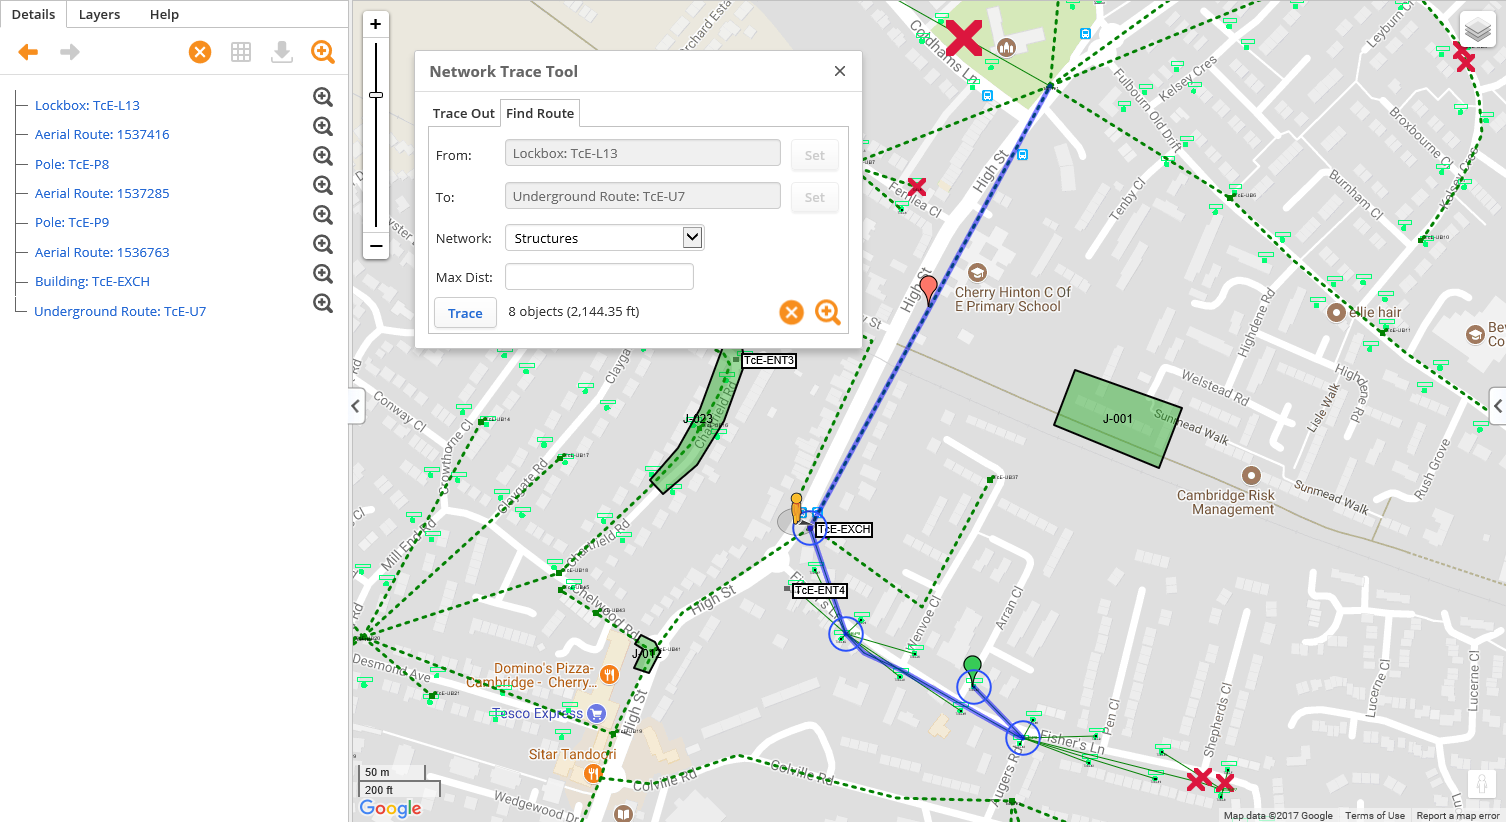
Figure: Trace route example
Exploring trace results
When a trace is displayed on the map, you can:
- Click Zoom to all
 to display the entire trace on the map.
 - Click Clear result
 to remove the trace from the map.
You can close the Network Trace Tool dialog and continue to explore the results:
- Hover over sections of the trace on the map to display the distance from the start point to the end point of the highlighted section.
- In the Details tab, click on
 beside an element to zoom to it on the map.
 -
For Trace Out results, in the Details tab, click
 or
or  to expand or hide details of additional routes.